The first article in this series discussed where the air actually goes—mouth, nose, trachea, and lungs—and this article will begin with ribs. For each of these articles, I’m going to restate the main idea, which is that there are lots of moving parts associated with breathing and anytime that any of those parts is not able to move in the right direction, at the right time, and/or with the right amount of ease and freedom, it’s going to impact the quality of our breathing.
How many ribs do we have?
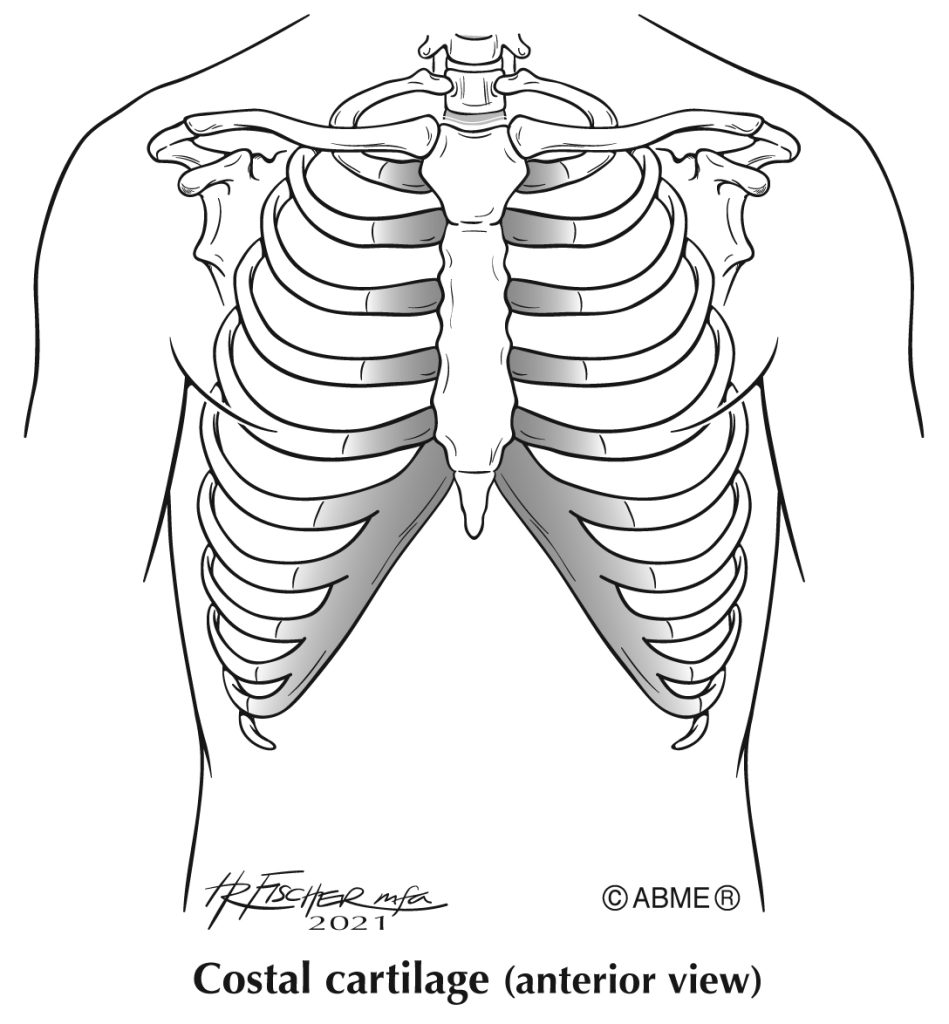
We have 24 ribs, 12 on the right and 12 on the left, all of which attach to the spine in the back. Ribs 1 to 7 are attached directly to the sternum through costal cartilage. Ribs 8 to 10 attach to the cartilage of rib 7, which then connects to the sternum. Ribs 11 and 12, the floating ribs, do not attach in the front. Most of us are aware of the movement of our lower ribs, but we often aren’t familiar with the uppermost ribs. Rib 1 is way up high, behind your collarbone. The first rib that you can feel easily at its connection to the sternum is rib 2.
The size and shape of the ribs changes as you go from top to bottom. At the top, they are smaller and more curved. As they get longer, the are less shaped like a letter C. Also note that they are higher in the back than they are in the front. They are not parallel to the floor!
Rib Palpation
Start by finding your sternum in front. Search for where you can feel the ribs attaching to the sternum. Choose one rib to walk along with your fingertips, starting from the attachment at the sternum. As you progress along the rib, you might be able to feel a difference in the texture as you move from costal cartilage (more squishy) to the actual bone itself (harder). Put your hands flat along your sides and you should be able to feel ribs there. Place your hands, palms down on your low back with fingers pointing down and you can feel ribs back there. To find the floating ribs, start in the back with the lowest ribs and walk your fingers along the lowest two ribs. You’ll find that they just stop—they do not continue forward to the sternum.
Rib Movement
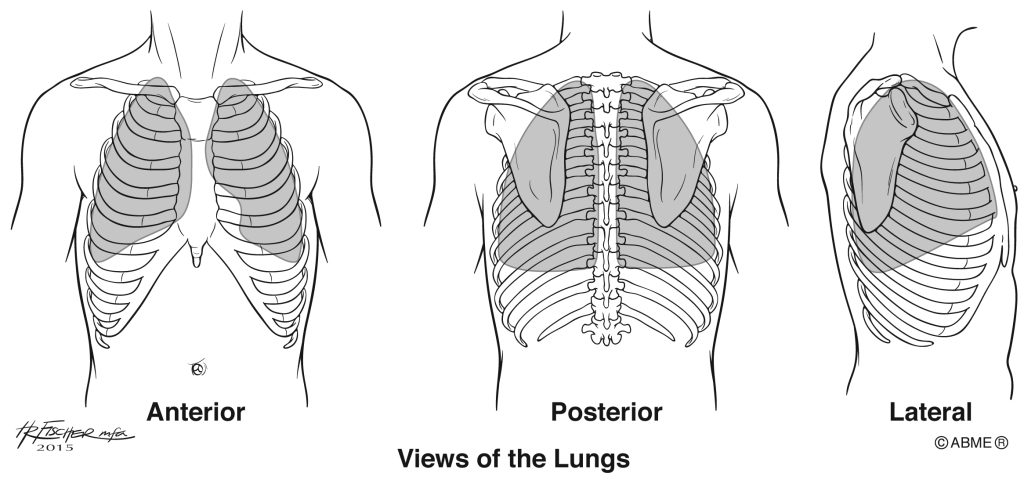
When we inhale, the ribs move up and out, like the handles of a bucket. This creates more space inside the thoracic cavity. Because air is a gas, it obeys the rules of physics. Gases move from areas of high pressure to areas of low pressure. When the thoracic cavity gets larger, it’s creating an area of low pressure inside and air from the outside (high pressure) moves in to fill the tissue of the lungs.
When we exhale, the ribs move back down and in. This is making the thoracic cavity smaller and putting it under higher pressure. The air inside the lungs (high pressure) moves out of the body to an area of lower pressure.
In my classes, my students often roll their eyes when I start up with physics! Here’s another way of thinking about high pressure and low pressure. Imagine that you’re in an average sized classroom with 150 kindergartners. This would be a high pressure situation, would it not? What can we do to decrease the pressure? There are two choices: we can open the door and some children run out (air movement during exhalation), OR we can make a bigger room (inhalation).
Rib Exploration
Place your thumbs in your arm pits and let your fingers rest of the top of your sternum. As you breathe in, notice that your fingers are moving slightly apart. This is because your ribs are moving underneath, up and out, during inhalation. As you exhale, they come down and in, while your fingers move slightly closer together. Keep in mind that the actual ribs themselves are not changing shape—they can’t because they are made of bone. The position of the ribs can change, though.
Neither lungs nor ribs are muscles. They cannot move themselves. The next article in the series will talk about where the muscles are that are responsible for air moving in and out of our lungs.


